Having a photo frame displayed in your living room is such a common idea.
Why not give a shot to make a photo transfer on a piece of nice-looking glass as decor?
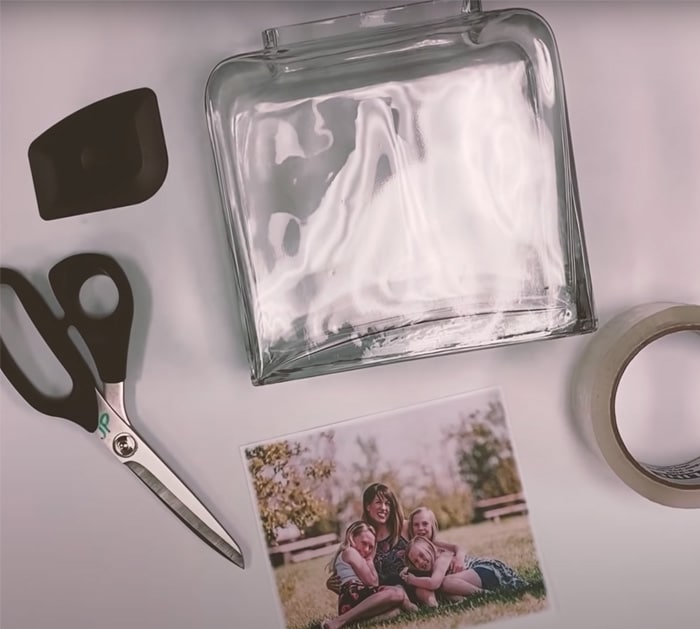
Materials:
Directions:
Lay all the materials on a table.
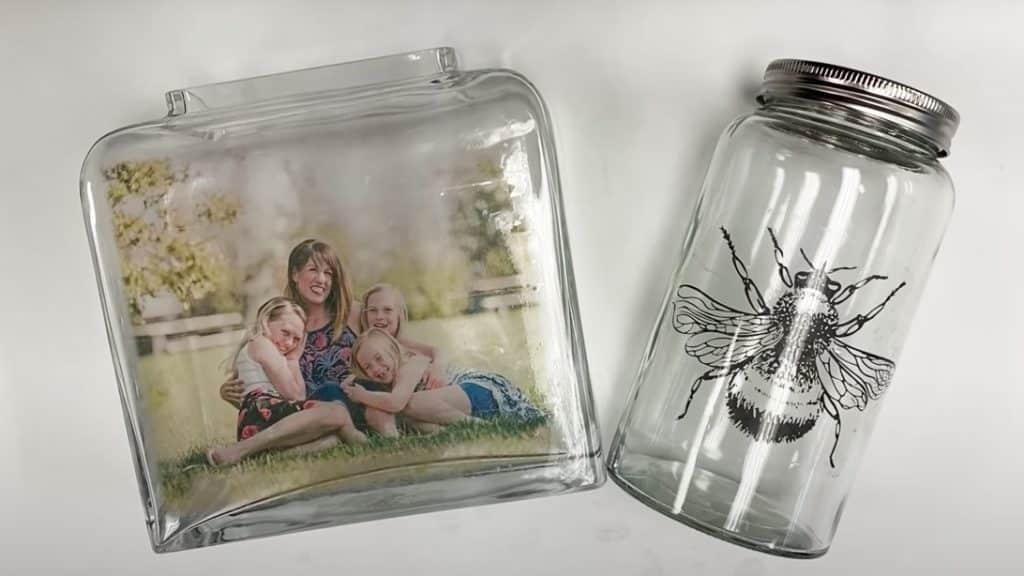
Image credit: BFranklinCrafts on Youtube
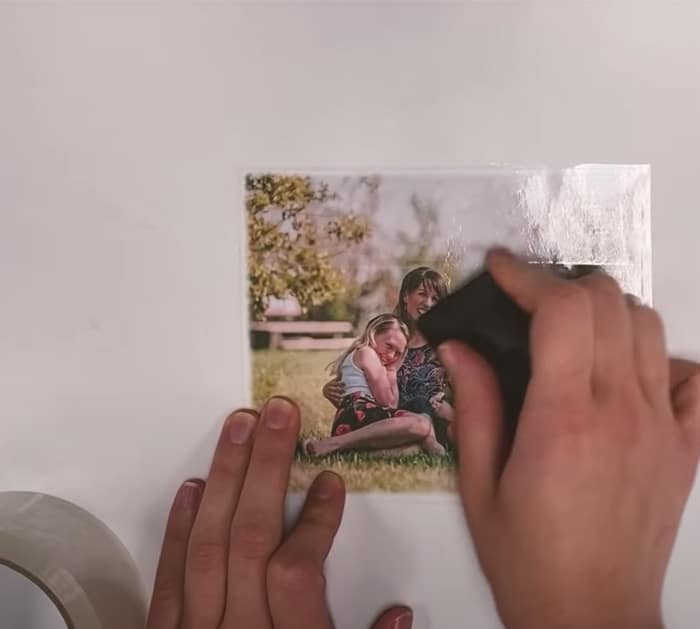
Stick the picture right onto the stick part of the packing tape.
And try not to wrinkle it.
Trim the edges of the tape or any excess sticking out.
Put the picture right side up.
Take out the photograph with packing tape pressed on it and put it in a bin with warm water.
Let it soak for about 2- 3 minutes.
After that, you should start rubbing off the photograph so that only the translucent part remains.
check that there is no water left.
Take out your glass block.
double-check the sticky part of the photograph is still sticky.
Then press the picture onto the glass surface.
Rub the photograph surface again with a scraper or a burnishing tool, making sure there are no wrinkles.
Slowly peel off the tape once you see the image is transferred to the glass.
check that the surface of the glass where the image is transferred is nice and smooth.
you’re free to now have a tiny piece of art ready to decorate on your shelf.
