Fairies are among the great fantasies of life.
It brings the adventurous sides of us as children back to life.
Sometimes, we even dream of being one.
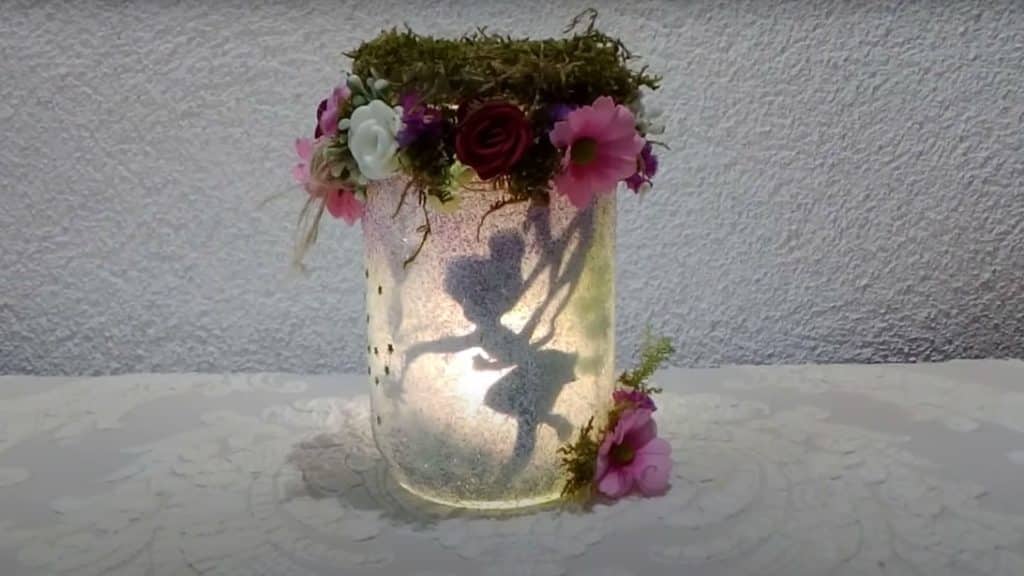
Image credit: Decor crafts on Youtube
YouTubesDecor craftsshares this creative and fun DIY project to brighten up our fantasies.
Materials:
Directions:
Prepare all the materials needed.
Precisely cut out your printout fairy design.
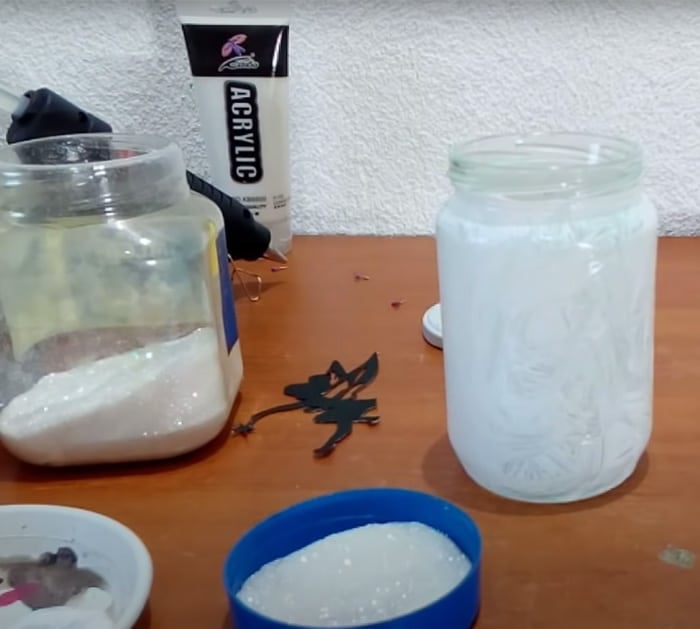
Damp your brush with glue and generously cover the outer sides of the jar with it.
Place a separate container of white glitter and gently dab it on the glue sides of the jar.
take a stab at make it as even as possible by covering all parts with glitter.
Pour purple glitter into a separate container and dab it on the top area of the jar.
Dab on the glue as much as needed.
Carefully glue one side or the front side of the fairy printout and stick it inside the jar.
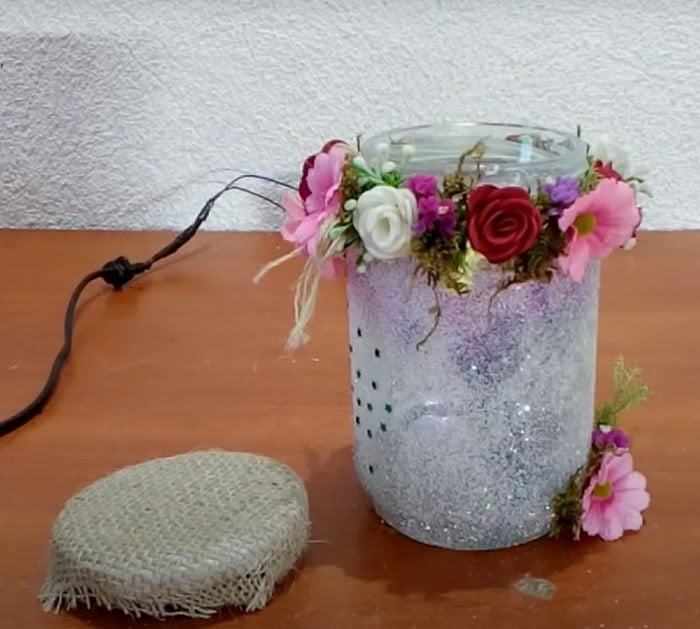
Take a good amount of moss and spread it inside the jar using a stick.
Manipulate as much moss as you want.
Place the artificial plants and flowers in the center with tweezers.
Be as creative as you’ve got the option to be.
Use hot-glue to stick some of the artificial plants and flowers on the inside sides of the jar.
Using hot glue, glue some of the moss on the bottom part of the outside of the jar.
While you are working with the moss, stick on some artificial flowers.
Make a ribbon out of the twine ends.
Glue on some moss and artificial flowers around the twine layer.
For the fairys fairy dust effect, glue on some mini stars.
With craft fabric, glue it on the top and sides of the lid.
Cut off the excess parts.
Glue some moss on top of the craft fabric on the lid.
Lastly, place some fairy lights inside the jar and seal it with the lid.
