If you love to quilt or sew you have to make this for your next project.
It will be the perfect travel bag for all your small tools and fabrics.
Learn the steps how to make one with this quilters organizer bag sewing tutorial byYoan Sewing Studio.
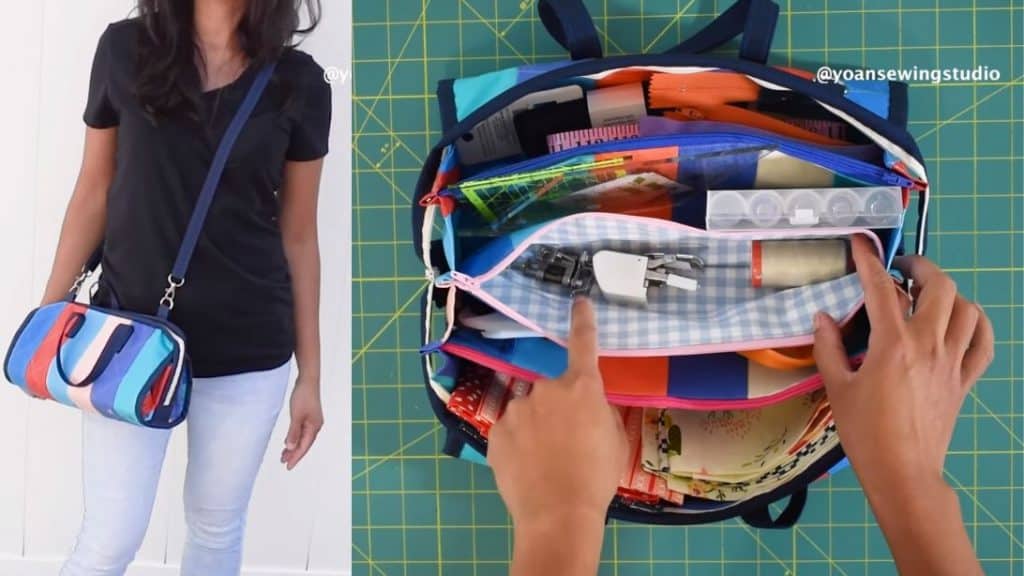
Image by: Yoan Sewing Studio
I am sure you will love the finished product!
Watch the video below for detailed instructions.
Finger press the seams after sewing each strip.
Flip the fabric to the opposite side after sewing one strip.
This will prevent the fabric from curling or becoming wavy.
Press the unit of fabric using an iron.
Step 2:
Trim off the salvage ends and straighten up the edges.
Grab your ruler and measure 10 from the edges of the fabric and then cut.
Make 4 pieces of this.
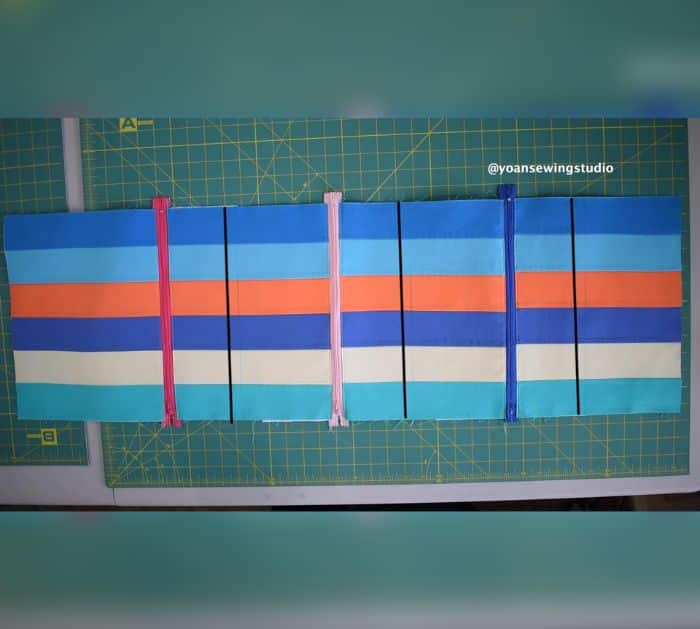
These will be the zipper pocket panels.
Your pocket panel should end up measuring 12 1/2 wide.
Step 3:
Apply fusible woven facing to all the pocket panel pieces.
Cut the fusible woven interfacing one inch smaller widthwise.
From your lining fabric, cut 6 pieces of pocket lining measuring 12.5 x 4.5.
Lay the zipper right side down on the left side.
Take a pocket lining piece and lay right side down.
Align the little metal from the zipper on the edge of the fabric.
Sew the edges with a 1/4 seam allowance.
Next, press the seams and top stitch.
Step 5:
Grab another pocket panel and lay it right side up.
Take a zipper panel and lay it right side up.
Then take a zipper panel and lay it right side down.
check that to match the color of the strips.
Grab the pocket lining piece and lay right side down.
Clip them in place.
Sew with 1/4 inch seam allowance.
Press the seams on both the exterior then do a top stitch.
Do the same process for the remaining 2 zippers, pocket linings, and pocket panels.
Repeat the same for the other 2 zippers.
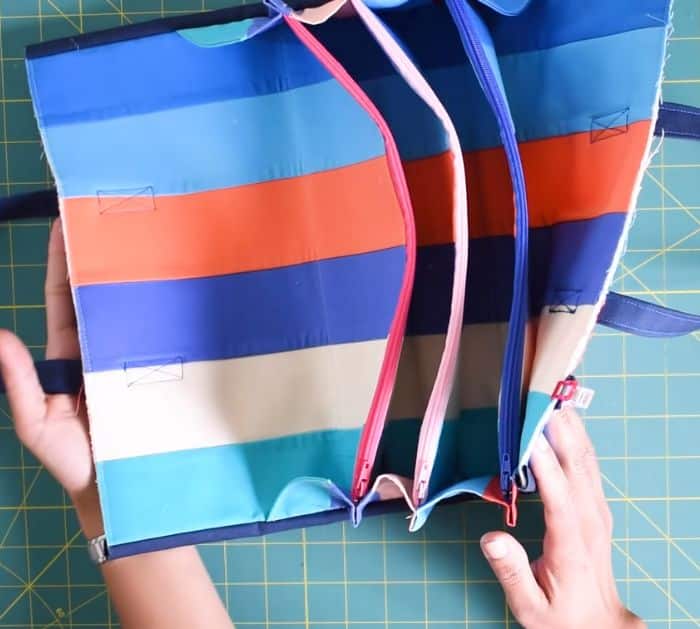
Lift the zipper, match the zipper seams and grab clips to secure them.
Do the same for the opposite side.
Once secured, sew right along the 3.5 mark line.
Repeat the same with the other 2 zippers and 3.5 lines.
Step 7:
Sew the remaining six jelly roll strips.
Press and trim the salvage ends.
Next, measure 17.5 and cut.
This will be the bag exterior piece then measure 8 and cut.
Make another one of this 8 fabric.
Lay your exterior fabric with a piece of batting that you cut slightly bigger.
Go ahead and quilt this as you desire.
Once done quilting, trim excess batting.
Cut both sides of this panel on an angle starting from the half-inch point mark down to the bottom.
Sew the side edges with a 1/4 seam allowance.
Flip it inside out and press.
It should measure 8 1/2 at the top and 12 at the bottom.
Top stitch along the sides and the top edges.
Attach the side panel to the sides of the pocket with a 3/8 seam allowance.
Baste stitch along the edges with 1/8 seam allowance.
Do the same for the other side panel.
Align one side of the edges of the interior with one side of the edge of the exterior.
Clip them in place and baste stitch the sides with 1/8 seam allowance.
Trim off the excess exterior fabric then baste stitch the short sides with 1/8 seam allowance.
Step 10:
Bind the sides with a binding strip and 1/4 seam allowance.
Step 11:
Prepare your handle pieces.
Fuse them in place with the fusible woven interfacing.
center the position of interfacing.
Fold the short edges toward the wrong side about half an inch and press.
Fold the long sides in half and press.
Then fold the edges towards the center fold crease and press.
Fold everything in half again and press.
Sew all around with a 1/8 seam allowance.
Your handles should end up measuring 3/4 wide.
Do the same for the opposite end.
Step 13:
Measure 1 1/2 from the edge of the handle and draw a line.
Make an X mark between the bottom seam of the handle and the 1 1/2 line.
Thats going to be the seam line.
Step 14:
Cut a basting tape about 2.5 long.
Stick the basting tape right on the seams starting from the 2.5 point.
Repeat the same to the opposite side.
Peel the top layer off then position your strap.
Sew the handle in place.
Do the same for the other handle.
Step 15:
For the strap anchors, make 1 piece of 4 x 3.
Fold the short side wrong side together and press.
Fold the edges toward the center fold crease.
Press then fold it again in half.
Top stitch the long sides with 1/8 seam allowance.
Cut the strip in half.
Fuse the straps the same way with the handles.
Then do the same process with the handles.
Attach the swivel hook and adjuster slider.
Step 17:
Attach the main zipper.
Once done, bind the raw edges and zipper tape.
For the zipper tabs, you need 2 pieces of 4 x 2.5.
Fold the short edges towards the wrong side.
Then fold the long edges right sides together and press.
Stitch along the sides.
Turn inside out and insert on the ends of the zipper.
