Are you encountering difficulty creating a placket for your blouse just like me?
Worry no more as I have found this sewing secret for blouses with a popover.
It has made my life so much easier for the sewing project that I am currently working on.
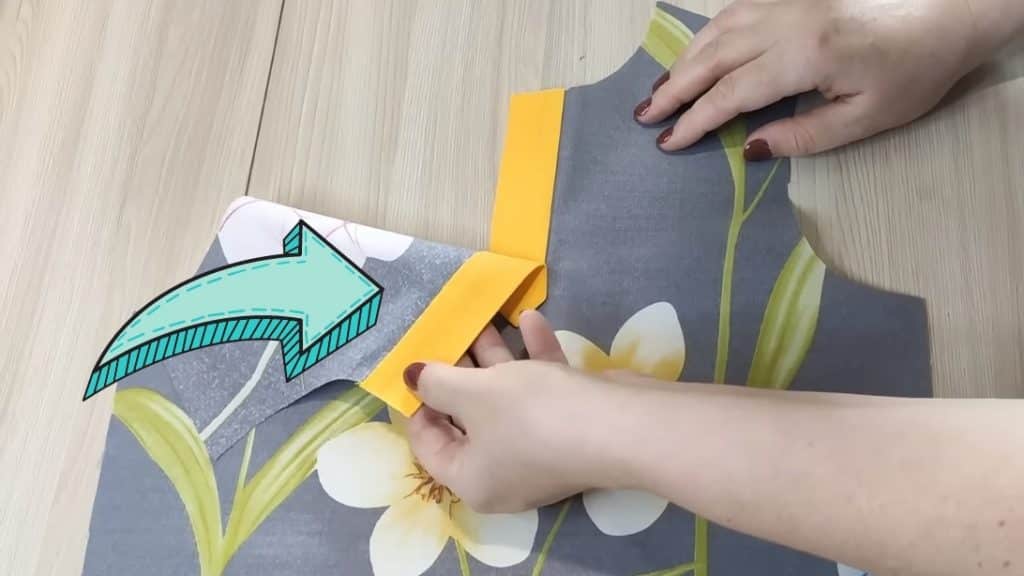
Image by: Sewing show
I can easily follow the steps I need to do with this tutorial bySewing show.
It helped me save a lot of time in figuring out how to properly do it.
Beginners and even professionals will benefit from this sewing tip.
Watch the full video below to learn this trick.
Once done, cut the middle line and diagonal lines from the rectangles.
Then create a small rectangle cut.
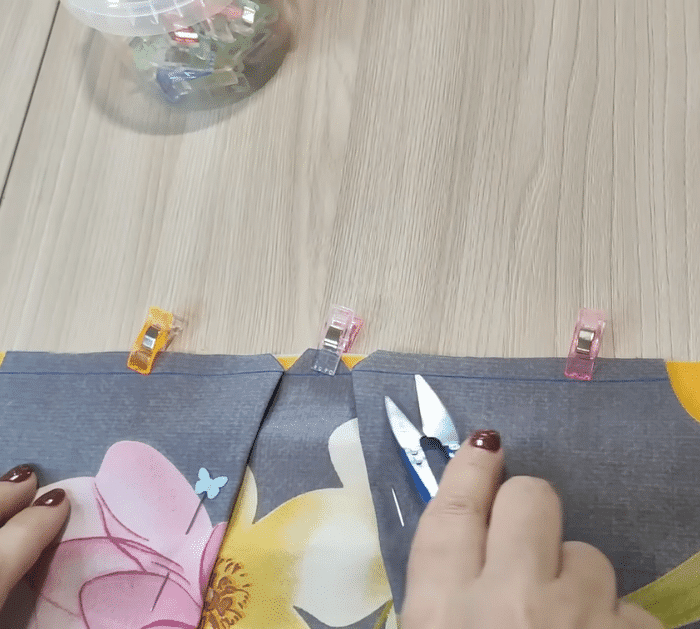
Secure with pins so it wont move.
Step 3:
Get a 3.15 x 11.8 inches cloth, then make 2 folds.
The first fold should be small and the next one a bigger fold.
Straighten the second fold and place the blouse on top.
Align with the rectangular cloth and start sewing on the line removing each clip as you pass through them.
Once done, flip the blouse and press with an iron.
Step 4:
Now the little fold is on top.
Take it without flattening and align it with the stitch and secure it with pins.
Once done, remove the pins and straighten the blouse.
Now it will look like a U-shape.
Next, fold the left part.
It will create a diagonal fold at the bottom of the placket.
Then take it again and fold it; so it sits perfectly on top of the right placket.
Press using an iron.
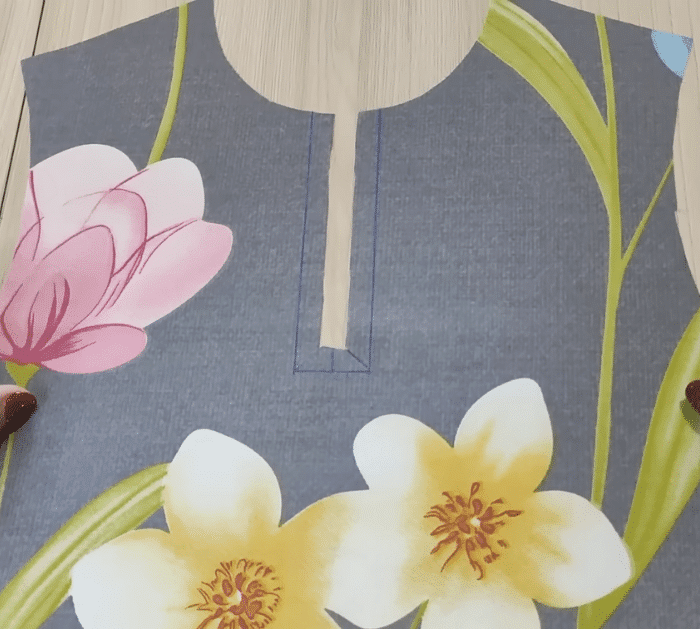
Then using a ruler, make a horizontal line above the triangular tip.
Sew that line and the edges of the triangular tip.
There you have it, an easy way to make a popover placket!
